Roses are red ...
Violets are blue ...
I've got some many leftover book pages, what should I do?
Okay,
so, I have got a lot of scrap book pages from another crafting project (which I will
post later), so I decided to do a paper rose wreath, another fun and
easy DIY you can do this Christmas.
You will need the following:
1. Your trusty glue gun + glue stick
2. Scrap paper or colored paper
3. Scissors
4. Faux pearls
5. Marker
6. Foam or cardboard

Make two circles on your foam or cardboard, one smaller than the other. We happened to have leftover foam from my parents' house, so I decided to use them, but you can also use a piece of hard cardboard if you do not have foam available.
Use your scissors and follow the marked lines to cut your wreath.
Now, you've got your base. My wreath base measured about 2-1/2 to 3 inches thick and about 12 to 15 inches across.
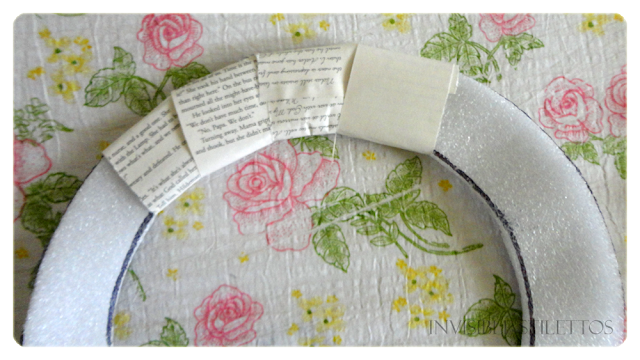
Now, get your scrap paper and cut them into strips.
Wrap them around the base to cover your wreath.
This would be great in case you don't evenly space your roses later as this would camouflage the imperfections and make the gaps less noticeable.
This would be great in case you don't evenly space your roses later as this would camouflage the imperfections and make the gaps less noticeable.
Now that you're done wrapping, set your base aside. Those paper strips do not have to be perfect as these will be covered with paper roses later.
Next, I'll teach you how to make the paper roses. Get a piece of paper.
Fold it crosswise.
Then, fold the paper lengthwise.
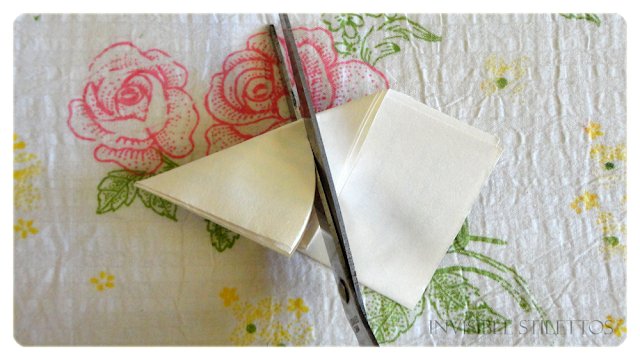
Make a right angle triangle by bringing the right corner toward the left vertical side.
Cut the paper at an angle.
Unfold the paper and you've got a not so perfect circle (bahaha!)
Practice makes perfect, so keep on trying different angles. Besides, we don't need a perfect circle for this project.
Practice makes perfect, so keep on trying different angles. Besides, we don't need a perfect circle for this project.
Cut the circle into a spiral, starting at the outer edge going in.
Once you have done that, roll your paper the same direction as you did the cutting, going inward toward the center of the circle.

Now you've got your first ever paper rose done!
Once you have done that, roll your paper the same direction as you did the cutting, going inward toward the center of the circle.

Now you've got your first ever paper rose done!
If you like, you can add a faux pearl at the center of each rose you make.
Make tons of paper roses until your hands go numb. I made approximately 75 to 80 paper roses, my hands were dead, but it's worth it. Time to assemble your paper rose wreath. Start by sticking the roses at the inside edge of your wreath using your glue gun + glue stick. I have made three layers of roses here. You can do more if you wish.
 Time to assemble your paper rose wreath. Start by sticking the roses at the inside edge of your wreath using your glue gun + glue stick. I have made three layers of roses here. You can do more if you wish.
Wait for everything to dry and you are ready to hang your masterpiece!
I put mine at the front door. Since it's Christmas, we put pine leaves garland around the wreath and attached a ribbon and a Christmas ball at the center.
I put mine at the front door. Since it's Christmas, we put pine leaves garland around the wreath and attached a ribbon and a Christmas ball at the center.
Now, it is time to admire your work :) Hope you have fun doing this project!


Wow, such lovely paper roses. The wreath is beautifully done.
ReplyDeletehttp://styleandglow.blogspot.com/
thank you!
Deletexoxo
once you are done rolling the paper roses, how do you best secure them so they won't unroll? thanks
ReplyDelete