Good day dearies! Electricity's finally up and running again after the storm. How are my fellow Filipino readers? I do hope you are all safe. This post I have drafted just before the storm, but because I power interruption, sadly, I haven't posted it. I made this simple home decor last weekend. You all know that I love me some flowers in our home. Bringing the outdoors in is a great way to prettify and brighten up our homes, but plants can get too "yellow" even those perfect for shade when there's completely no sunlight making maintenance a chore where you would have to bring out the plants every once in a while for their dose of sunlight. This is the very reason why I love using faux plants or flowers inside the home. This project I placed in our living room. I do hope you get inspired by this simple project I made.
For this, we will need the following:
1. Styrofoam or floral foam
2. Old newspaper
3. Faux flowers of your choice
4. Spray paint
5. Plastic pots
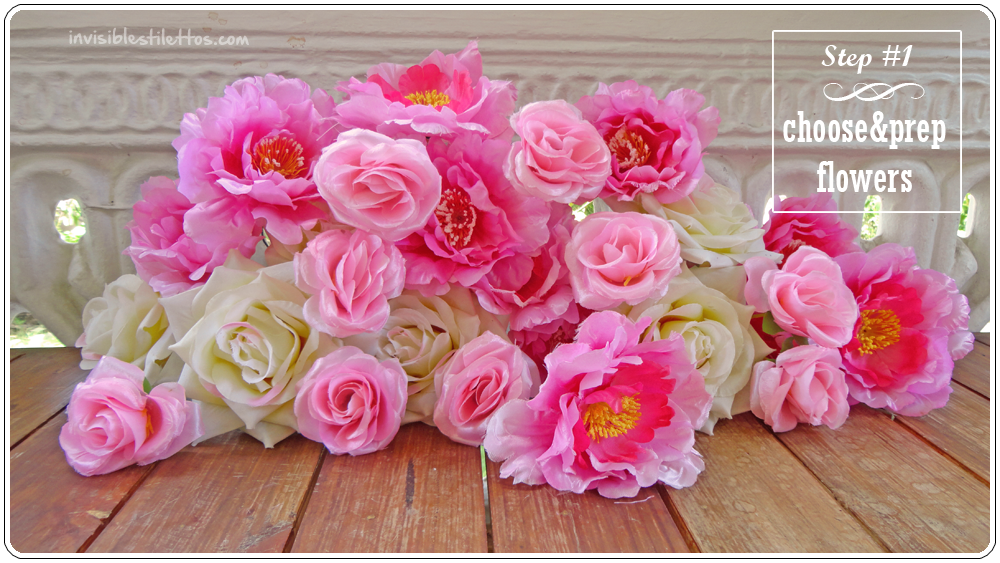
Let's start. First, pick some flowers. For this project, I chose the pink and cream combo. I think this will match the baby blue color of our living room. I've got faux peonies and roses. You can choose any flower you like. Measure the stem length of your flowers and then cut according to pot depth. Remove extra branches and leaves.
Next, go outside, somewhere where air is circulating then place newspapers on your work area. Place your pots and start spraying. I chose pots with stands which I think are pretty cool. I painted it pure white just because white is versatile and if I wanted to change up the flowers, it would still match the color of the pot. Follow your spray paint instructions. Shake vigorously then spray thinly by spraying at a distance. Let the first layer dry then spray again until you cover the whole surface and let it dry completely.
This is how it looked like while drying. I placed it on our terrace to completely dry.
Next, cut some Styrofoam or floral foam. I used Styro because that is what I have at the moment but floral foam is ideal. Place your cut foam inside the pot. Fill it so all sides have foam.
Next, stick your flowers on your foam. Start at the center then work your way out. I place the large cream roses at the center then peonies at the side then small roses as fillers for any remaining gaps.

Here is what my flower pots looked like after. A simple decor for my living room that will make a great impact :) I really love how it turned out.

Here is what my flower pots looked like after. A simple decor for my living room that will make a great impact :) I really love how it turned out.
Did you get inspired by today's DIY?
I want to see your version. Like us on Facebook
Invisible Stilettos
and post your version of today's project :)
Til our next DIY guys!
Stay safe!
I want to see your version. Like us on Facebook
Invisible Stilettos
and post your version of today's project :)
Til our next DIY guys!
Stay safe!


Great DIY. That's pretty handy for a wedding. or any event. :)
ReplyDeletethe plastic pot don't look like plastic or cheap when painted, very nice and they will really go well with your blue living room
ReplyDeleteI love what you did with the plastic pots! I am actually thinking of ways to spruce up my garden and you just gave me a great idea. Thanks for sharing!
ReplyDeleteay sis if martha stewart picked and army of asian DIY bloggers youd be one of them talaga. love this tutorial :)
ReplyDeleteglad your power is back on! we dont have electricity yet (went to a friends condo to use their internet for tonight) a post fell on top of our car cause of the storm -- all our lines are broken na din =|
This one is so pretty, loved reading it.
ReplyDeleteLovely! :-)
ReplyDeleteGlad you shared this, I've been looking for small urn style plastic pots, where did you get it?
ReplyDeleteSo pretty! Thanks for sharing this DIY. It's very creative and the end result is really nice! <3
ReplyDeletehttp://itsthekyliebabii.blogspot.com/
Gorgeous flowers you did an amazing job doll. Happy the storm pass for you.
ReplyDeletehttp://tifi11.blogspot.com
Wonderful idea! They look so pretty!
ReplyDeletehttp://bellapummarola.blogspot.it/
It's wonderful!! I love the colors and it's actually more neat than the real ones.
ReplyDeleteWonderful DIY dear. Your steps makes it seem very simple for all :-)
ReplyDeletehttp://naturelbellefemme.blogspot.com
i love this DIY project sis, I will also try to do this! <3 <3
ReplyDeleteAchieved ang shabby chic look sis! Grabe, nakakainspire talaga ang creativity mo! That's why I visit your blog pag gusto ko ma-inspire at makakita ng magagandang bagay. :)
ReplyDeleteLove it! Wanna try it too. I have a couple of old flower pots that needs some painting.
ReplyDelete